
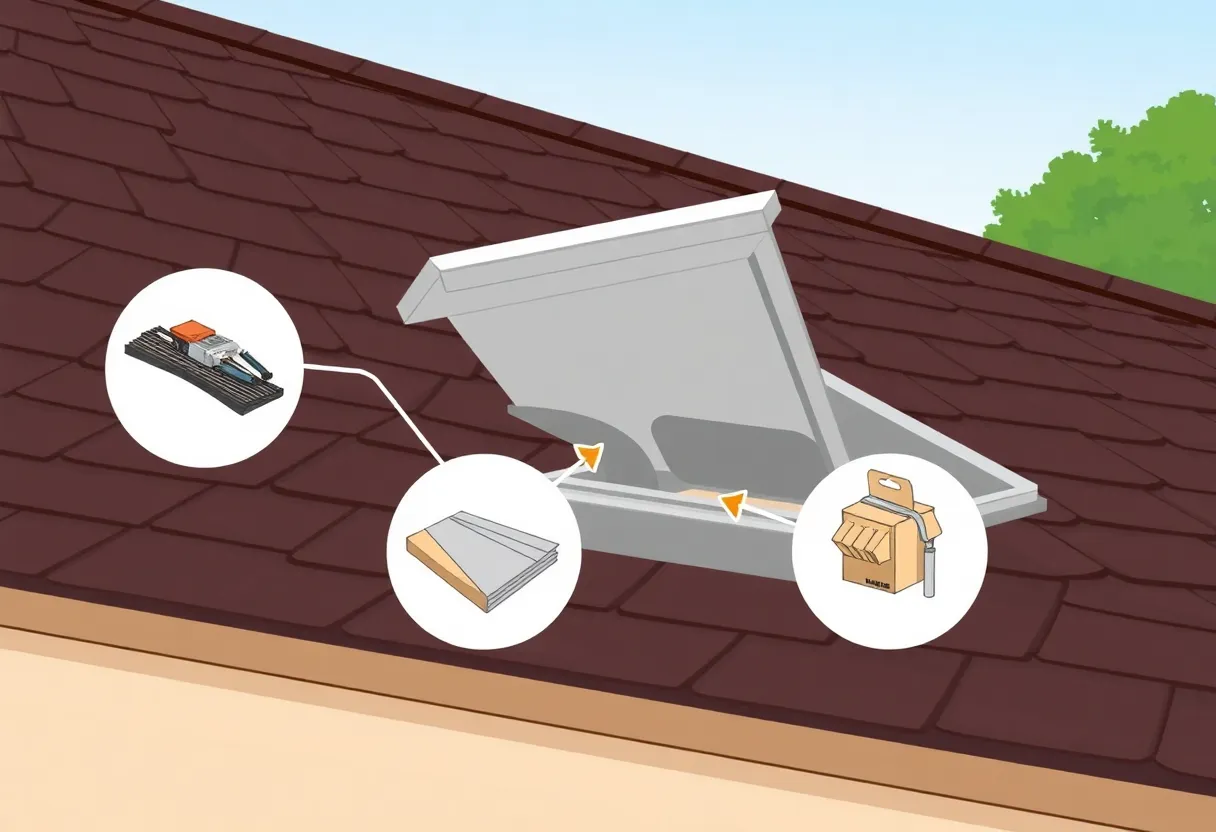
Step-by-step installation of a roof access hatch for easy maintenance access.
Article Sponsored by:
Mays Contracting is more than just a roofing company; it’s a family legacy built on trust and quality. Founded in 1979, we’ve been serving the community for over four decades. Our story began with a simple vision: to provide exceptional roofing services for both residential and commercial properties. This vision has guided us ever since, as we’ve grown from a small, family-run operation to a trusted name in the industry.

Installing a roof access hatch can be an essential improvement for your home, especially if regular access to your roof is required for maintenance or inspection. This guide outlines a clear, methodical approach to help homeowners install a roof access hatch effectively. Follow these steps to avoid common pitfalls and ensure a professional finish.
A roof access hatch serves multiple functions, including facilitating roof inspections, repairs, and ensuring compliance with safety regulations. Here are several reasons to keep in mind:
Selecting the optimal location for your roof access hatch is critical. Here are several factors to consider:
Before beginning the installation, gather all necessary tools and materials to ensure efficiency. Here’s what you might need:
Begin by measuring the dimensions of the hatch. Ensure that it fits the size specifications provided in the manufacturer’s instructions. Mark the area on the roof where you will cut.
Using a power saw, carefully cut through the roofing material in the designated area. Remove any shingles, tarpaper, or other covering to expose the decking beneath.
To ensure the structural integrity of the roof, install additional support around the opening. Use plywood or lumber to create a frame that reinforces the edges.
Position the hatch frame into the cut opening. Make sure it is level and square. This step is crucial for ensuring that the hatch operates smoothly.
Fasten the hatch frame to the roof deck using screws. Follow the manufacturer’s guidelines for the appropriate number and spacing of screws to ensure a secure installation.
Install roofing flashing around the hatch to divert water away, preventing leaks. Seal the edges with a high-quality roof sealant to further enhance waterproofing.
Close and open the hatch several times to ensure smooth operation. Check for any gaps or leaks around the edges and apply additional sealant if necessary.
Once the installation is complete, conduct a thorough inspection. Check all seals, test the hatch, and ensure that there are no significant gaps. Safety should be your priority.
Once your roof access hatch is installed, regular maintenance is essential. Periodically inspect the hatch and surrounding area, ensuring it remains watertight and functional. Clean any debris that might accumulate around the hatch to ensure safe access.
If you encounter challenges during installation or feel uncertain about your ability to complete the project, consult with a roofing professional. They can provide insight and assistance as needed.
By following this step-by-step guide, homeowners can successfully install a roof access hatch that provides safe and reliable access to their roofs. Careful planning, attention to detail, and a commitment to safety are essential throughout this process. Ensuring a proper installation will not only ease maintenance tasks but also enhance the overall functionality of your roofing system.
With the right tools, materials, and mindset, adding a roof access hatch to your home contributes to improved accessibility and greater convenience in maintaining your property.
Quality Roof Construction and Repair in Lexington, Richland, Newberry and Laurens Counties for over 40 Years.
News Summary A wildfire in Carolina Forest has spread over 2,059 acres, although it is…
News Summary On Wednesday morning, a 1.5 magnitude earthquake was recorded in Elgin, South Carolina.…
News Summary Spartanburg, South Carolina, is thrilled to welcome Milo's Tea Co.'s new $200 million…
News Summary Seibels Bruce Insurance Company, a prominent figure in South Carolina's insurance sector since…
News Summary South Carolina has reached a remarkable $5 billion trade relationship with Canada, marking…
News Summary The Michelin Guide is launching its first-ever regional edition for the American South,…